


Making A Fantasy Town Map (With Tutorial!)
Learn how to make a fantasy town map!

Hello, friends, and welcome back to The Kindness Cafe! If you saw last week’s post with my first-ever Character Profile (featuring my main character), you’ve probably gathered that my series is fantasy.
Since all of the elements in my fantasy world are completely made up, sometimes I struggle to make certain elements make sense. My series revolves around a quest that moves the story from setting to setting, but if I don’t know which direction my characters are going or even where they ARE, I can’t write my story. And that’s where maps come in.
Maps are one of the most important tools I have ever come across as a writer. They’re easy to draw, fun to make, and they save you time in the long run. By knowing what your towns, cities, and countries look like ahead of time, you’re ensuring more time for writing and revising and less time being stuck over setting-related plot holes!
In this post, I’ll explain why I made a recent map of one of my fantasy towns and how you can make a fantasy map (with pen and paper) yourself! There’s a lot to get into, so let’s get started.
Why I Made My Map:
I’m currently re-outlining the first book in my fantasy series. Using the reverse outlining method (outlining after your first draft but before your second draft), I’ve started adding or taking out scenes that fit (or don’t fit) my story! And as I said earlier, if I don’t know where my characters are during a scene, I can’t write it efficiently.
In one part of my book, my characters are wandering around a busy town. They all arrived in different ways (walking, using transportation, etc), so knowing which routes they take or landmarks they pass will be important information! With all of that in mind, I decided to make a map of that town!
How To Make A Fantasy Town Map:
#1: Do some research!
When I started making my town map, I had never made one before, so the first thing I turned to was my handy search engine. Surprisingly, there’s not a lot of articles or tips for creating a town map by scratch, but I managed to find an amazing article that I’ll link to in the bottom of my post!
#2: Gather your materials.
After I had done some research, the next step was to gather my materials! I started with a Ticonderoga pencil and a 8’ by 11’ sheet of printer paper, although later I ended up using a black Sharpie to outline details and a few IKEA markers to bring color to some landmarks. I’d advise starting out with pencil and paper, so you can erase mistakes, but feel free to use whatever you’d like!
#3: Decide what town you’re drawing (and read your descriptions of that place).
Before I actually started drawing, I went back and read the chapters of my book that included the town. This is a super important step so that you don’t add (or miss) landmarks or natural features that your town has!
#4: Do a rough outline.
Take a piece of paper and quickly sketch out your town. It doesn’t have to be super fancy!
#5: Get some feedback from someone who’s read your story.
Before you go any further with your map, get some feedback from a beta reader. Does everything in your town make sense? Is there another, easier path the characters could take? Make sure you get some input!
#6: Repeat Step 4 (if needed) OR draw the compass rose.
For those of you who don’t know, a compass rose is the compass in your map (usually the top left or bottom right) that has your cardinal directions: North, East, South, and West. Drawing it first is a good idea – this article was super helpful in learning how to draw one!
Knowing which direction your map is going is helpful for two reasons: so you don’t hang the map up wrong, and so you know what direction the characters are coming from in your book! If you write that they go north in the town and you draw their destination south, you might have some problems.
#5: Draw your major landmarks and add labels.
If your town has a natural feature like a river or a mountain, draw the outline of that. You might also want to draw the most important places in your town (like the inn your characters stay at, or the shop they go into briefly) – make sure to label those places on your map!
#6: Add roads.
Now you want to think about where your characters are going to move from place to place. Draw roads, pathways, trails, and/or anything that will be important to your story. Are your characters going to slip out of a side alleyway behind the hotel they’re staying at? Make sure to add that too!
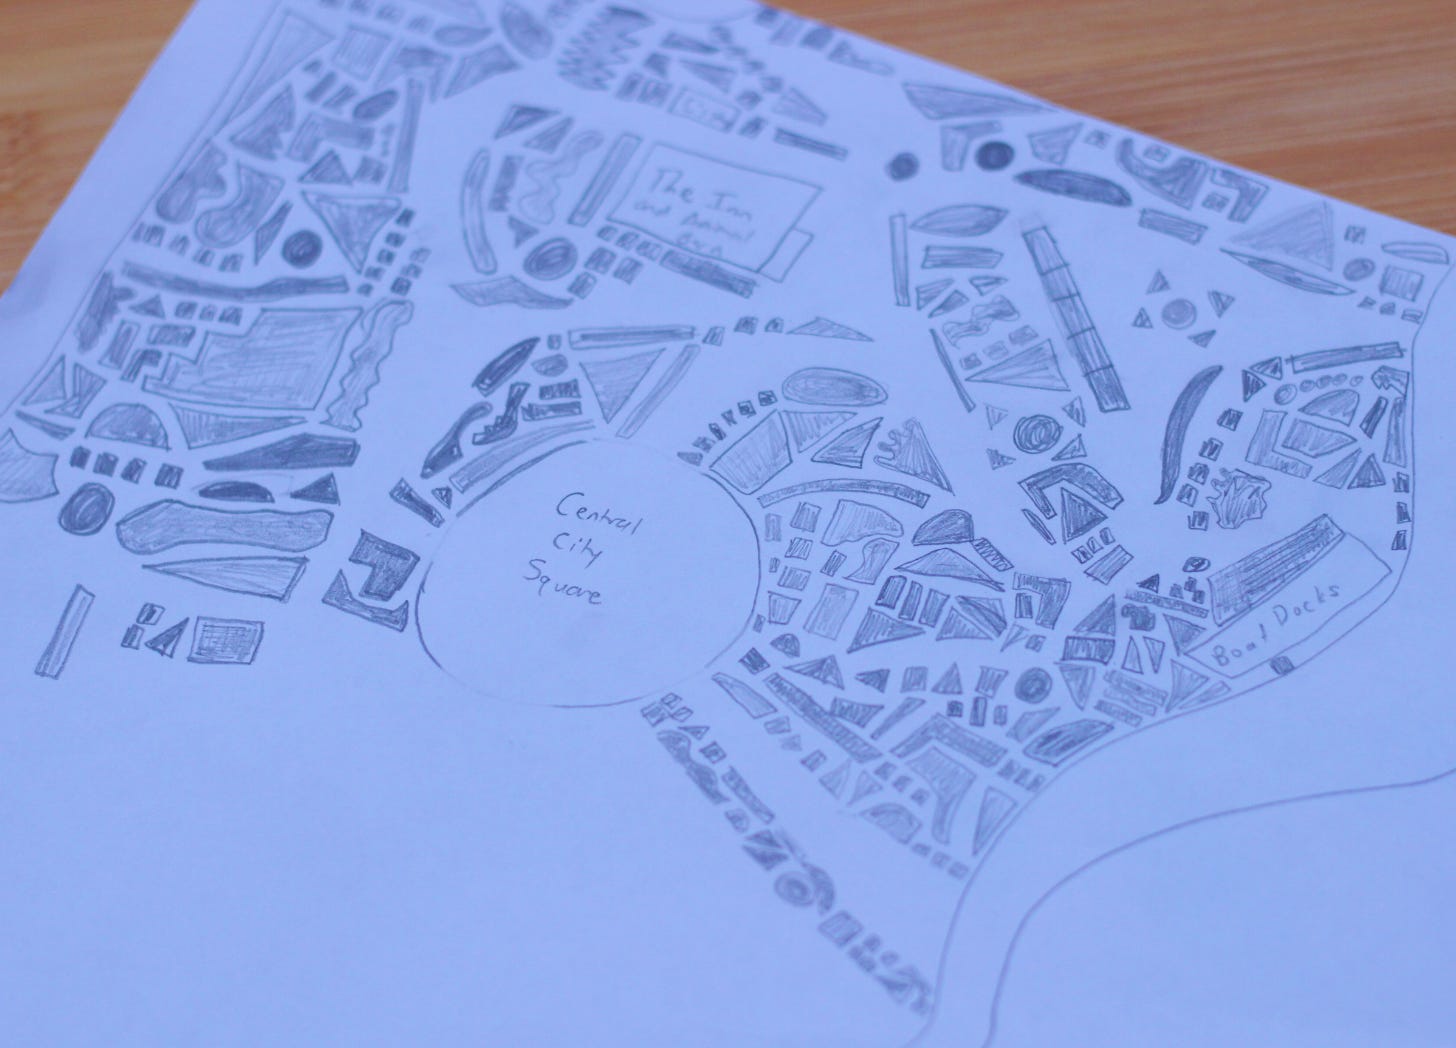
#7: Fill in the white space with shapes.
This part is the most time intensive…draw shapes for your map. These shapes will make up the bulk of your map and give it depth! If you’re making a big, busy town, make sure to include lots of shapes.(If you’re making a small town with minimal homes, you might want to skip this step!)
They can be any kind of shape, big or small: triangles, squares, rectangles, circles, squiggles, you name it. Leave space on the map for pathways, but have fun with the shapes…go wild with them.
#8: Polish.
If there’s anything else you want to do with this map, now’s the time! Add shadowing, layering, or color, make the buildings more dimensional, add a border or your name at the bottom…it’s all up to you!
#9: Admire your finished product!
You’ve just created an entire map…congratulations! If you want, you can hang your map up on the wall or even frame it for your whole family to see! (And — now you know what your town looks like for writing purposes!)
As promised, here’s the link on how to create a town map that I found so helpful.
If you liked this post, why not stick around?
Interested in learning about my story? Try my first ever Character Profile, where I interview my main character!
Want to know more about my writing process? See how I make details part of a character here.
And if you like musicals...why not read my two-part EPIC series?
Would you like more writing resources? Check out My Writing Compilation Post!
*******************************************************************************************
Thank you for reading The Kindness Cafe! Please subscribe to receive new posts and support my journey!
Disclaimer: if you are under the age of 18, please get parental permission before subscribing.
Great post, Addie! I've been thinking about making a map of my city for a while (but wasn't sure where to start) so this came just at the right time!